本篇日志记录如何使用 gitment 为博客提供评论系统
0x0 Gitment
是一个基于 github issue 系统作为评论数据的评论系统,hexo next 主题支持 Gitment
它的特点是不需要部署服务端,使用 github repo 的issue作为数据空间,这一点跟 hexo 使用 github pages 的调调很搭。
0x1 准备
首先,我们得创建一个 github repo
直接使用博客的 repo 就可以了其次, 需要创建 github auth 应用
进入 https://github.com/settings/developers 创建 OAuth Apps;
填写相关信息
应用名如: Gitment
homepage url: https://chenjiancan.github.io
https://chenjiancan.github.io
创建完成得到了 Client ID & Client Secret,用于配置 gitment 应用
- 配置next主题
编辑 next/_config.yaml, 找到 gitment 部分1
2
3
4
5
6
7
8
9
10
11
12
13gitment:
enable: true
mint: true # RECOMMEND, A mint on Gitment, to support count, language and proxy_gateway
count: true # Show comments count in post meta area
lazy: false # Comments lazy loading with a button
cleanly: false # Hide 'Powered by ...' on footer, and more
language: # Force language, or auto switch by theme
github_user: chenjiancan # 必须填写github id
github_repo: gitment-comments # 必须填写要存放评论的 repo 名字
client_id: <Client ID 的值> # 必须填写github auth app 的 Client ID
client_secret: <Client Secret 的值> # 必须填写github auth app 的 Client Secret
proxy_gateway: # Address of api proxy, See: https://github.com/aimingoo/intersect
redirect_protocol: # Protocol of redirect_uri with force_redirect_protocol when mint enabled
重新生成站点,部署,查看帖子底部,就会出现评论区
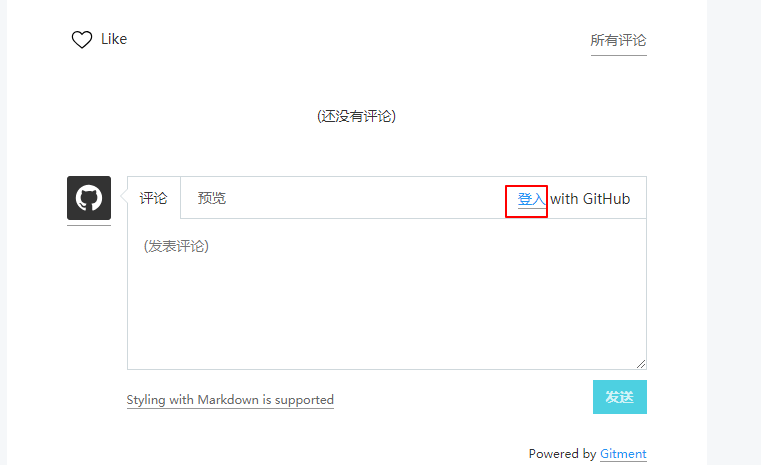
点击登录,授权 github 账号权限给 Gitment 应用,就具有评论权限了。
- 初始化评论
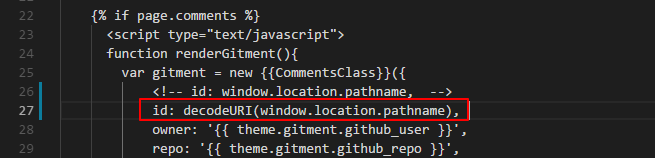
Gitment 默认每篇日志的评论都需要先点击初始化本页评论按键,进行初始化后,才能正常评论,其实它是向issue创建一个label (默认以日志的标题作为值),然而,如果是中文标题的就会初始化失败,原因是 标题太长,超出github的限制, 参考 https://github.com/imsun/gitment/issues/66 ,解决方法是改变 Gitment 代码,让它使用短一点点字段,比如用日期,这里使用的方式是 id: decodeURI(window.location.pathname),具体是修改 /themes/next/layout/_third-party/comments/gitment.swig 里的